Monday, August 23, 2010

August Groundwork

It's time to prepare your garden beds for fall! In late August and early September a new planting season begins, be ready to sow cool weather vegetables. Begin by looking through seed catalogs for inspiration, there's an amazing variety of of vegetables available. Last fall I planted Royal Oak leaf lettuce and Red Sails, both were an amazing addition to my garden and salad bowl. Experiment with purple broccoli or sow seeds of white radishes. Remember to rotate your vegetables to different locations in your garden from year to year. If you want a continuous supply of crops, sow seeds every two weeks during the planting season. Thin seedlings (and toss into your salad) when the plants have two to four leaves, leaving room for the growing plant. Consider planting enough of your favorite, tried and true veggies to share, bottle or barter!

Things to do in August

Prepare fall beds, spread 4-6 inches of compost or well-aged manure on top of soil. Turn in to a depth of 12 to 18 inches.
Deadhead flowers and harvest vegetables to promote continued production. Remove spent and dried plants that didn't make it through the summer.

Sow seeds for a second crop of summer squash, sweet corn, cucumbers, snap beans and carrots.


After August 15th you may begin to sow fall vegetables (see planting calendar ). Carefully monitor your watering.

Fertilize citrus trees a with nitrogen rich citrus feed, water at a depth of 3 feet at the trees outer canopy.


Plant Sweet Corn by the end of August, choose varieties that mature within 65 to 80 days. Amend soil with organic matter(nitrogen) and keep seeds moist until sprouting.
Trim back tomato plants by 1/3 to encourage new growth as weather cools.

Wait for the cool Autumn breeze!

Tuesday, May 25, 2010

ZUCCHINI WALNUT MUFFINS


Muffins in May? Is that odd? Since zucchini will soon be in abundance I thought I would be prepared with a few great recipes.

This recipe comes from the June 2009 issue of Cooking Light magazine. I added walnuts since I like a little crunch in my muffins, and zucchini and walnuts are a good combination. I also mixed in the little tiny bits of walnut dust with the cinnamon and sugar sprinkling it on top of the unbaked muffins. Mmmm, good.

Can't tell you if they freeze well since they didn't last long.

Ingredients
4.75 ounces whole-wheat flour (about 1 cup)
3 ounces all-purpose flour (about 2/3 cup)
1/2 cup sugar
1 teaspoon ground cinnamon
1 1/4 teaspoons baking powder
1/2 teaspoon baking soda
1/4 teaspoon salt
1 1/3 cups shredded zucchini
1/2 cup fat-free milk
2 tablespoons canola oil
2 tablespoons honey
1 large egg
Cooking spray
1 tablespoon sugar
1/4 teaspoon ground cinnamon
Preparation
1. Preheat oven to 400°.
2. Weigh or lightly spoon flours into dry measuring cups; level with a knife. Combine whole-wheat flour and next 6 ingredients (through salt) in a large bowl; stir with a whisk. Combine zucchini, milk, oil, honey, and egg in a small bowl; stir until blended. Make a well in center of flour mixture; add milk mixture, stirring just until moist. Spoon batter into 12 muffin cups coated with cooking spray.
3. Combine 1 tablespoon sugar and 1/4 teaspoon cinnamon; sprinkle over tops of muffins. Bake at 400° for 15 minutes or until golden. Remove from pans immediately; cool on a wire rack.


Kim
http://arizonatraveler.blogspot.com

Monday, May 10, 2010

May Groundwork

It seems as though spring has had a hard time leaving us this year. That's ok with me, but my tomatoes and peppers are having a hard time adjusting to the fluctuating temperatures! With this fair weather and a little digging, a vegetable garden becomes a family affair. Fast growing choices for kids might include: patty pan squash, cantaloupes, watermelon, and armenian cucumbers. Of course, the summer isn't summer without sitting in the shade of a sunflower house. (Plant sunflower seeds in a circle). Hopefully, cherry tomatoes were planted earlier in the season and are ready for little hands to pick while meandering in the garden. Here's the list of things to do for the month of May.

Continue to plant warm season vegetables, flowers, container fruit trees and citrus trees.

Transplant basil, garlic chives, lemon grass, oregano and mint.


Warm weather flowers include, marigolds, purslane, portulaca, sweet alyssum, scented geranium, zinnia, verbena and sunflower.


Citrus trees need to be fertilized, always water thoroughly before adding fertilizer.

As weather warms, increase your watering. Water deeply and slowly, but infrequently. Don't let soil get bone dry though. Check and reprogram water systems.

Add mulch, straw or compost around the base of each plant to help retain moisture.

Deciduous fruit trees should be thinned so fruit is 4 to 6 inches apart. (Just keep thinning! )Be prepared with bird netting and ladders as fruit ripens. Place netting before fruit is ripe! Another method is to pick the fruit before it's ripe and let it ripen indoors in brown paper bags. Water trees deeply to a depth of three feet every 7 to 10 days to provide moisture as fruit size increases.

Have shade cloth on hand to cover tomatoes as temps rise to the 95 to 100 degree range. Gently shake stems early in the morning to help pollination tomato flowers.

Feed roses every two weeks during their peak bloom season. Water deeply to 18 inches.

Harvest onions, garlic and chives.

Enjoy the merry, merry month of May!


Wednesday, January 6, 2010

January Groundwork

January is here and it's not a time for slackers. It's time to prepare for Spring! January is the month to prune, plant, and dig holes. This is the time to think about expanding your garden. But, don't think too long. The dormant bare-root trees need to be planted before the roots dry out and the warm sun stimulates the buds to leaf out.

Here's the list for the month

  • Plant deciduous fruit trees. If you are planting bare-root trees, get them in the ground as soon as possible. Don't let the roots dry out. Take the tree out of the bag and set it in a barrel of water with a little vitamin B. Let it soak overnight. Have your holes pre-dug and soil mixture ready. Here is a list of fruit and nut trees for the low desert. Many nurseries have potted fruit trees available. You can plant these any time in the next few weeks.


  • Start taste testing citrus fruits for sweetness. Navel, sweet oranges, mandarins and tangelos are close to harvest time.

  • Continue to sow seeds or transplants of cool-season vegetables for a continuous supply of salad greens and root vegetables until warm weather arrives.

  • Time to plant bare-root roses. Find a location where roses have filtered afternoon shade. Valley nurseries have hundreds of roses available. Rose societies will be offering how-to clinics for pruning and planting. Take advantage of the expert knowledge of the valley rosarians. Check out the Maricopa County Extension's rose publication for more information.
  • Prune established roses to encourage optimum blooming in April. Cut all canes back to approximately one half. Cut canes back to an outward facing bud. Remove dead canes. Remove old or weak canes. Strip off all leaves and dispose of them. Seal all cuts with Elmer's glue to seal new cuts. Don't be afraid. Practice makes perfect.

  • Sow seeds of tomatoes, peppers eggplants and basil indoors in time to transplant in the garden in late February to early March.
  • Continue to watch for freezing temperatures and protect frost-tender plants. The last average frost date is around February 15th.
  • Watch for gray aphids on tender new growth and hose off regularly with a forceful spray of water. Also, looper-worms like to eat cabbage, broccoli and cauliflower. Check under leaves and near the base and pick off worms.

  • This is a great time to add color and texture to your garden. Plant cool weather annuals between your vegetables. Calendulas, johnny-jump-ups, pansy, petunias, snapdragons and stocks will continue to bloom until spring. Cool-season herbs include, dill, parsley, cilantro and thyme.
  • Prune deciduous fruit trees by the end of January or before flowering starts.
  • If you are an adventurous gardener, plant asparagus now.


Have a great new year, and enjoy spring gardening in the desert!

Friday, January 1, 2010

I Have Completely Changed the Way I Garden!

I have officially changed my philosophy of gardening. It is already a challenge to have a vegetable garden in the desert of Arizona, but a year ago, I went to a gardening clinic that was taught by two Master Gardeners here in Maricopa County and they showed me a whole new way to garden.

It is called Square Foot gardening, and it was developed by an engineer named Mel Bartholomew. He has published several books and his official web-site is: www.squarefootgardening.com

Anyway, the Master Gardeners were both AZ natives and had been gardening here for many years. They had learned about this new method a few years earlier and were sold on it and now I am also.

The theory of it is to use square foot sections and to use them efficiently and you will increase your harvest while using less space. Let me explain.


You start by leveling your area where you are going to put your square foot planting boxes. I (yes, ME!), built four 4x4 boxes and one 2x4 box using 2x6 pieces of lumber. I placed them in the area where my garden has been for the past 17 years. I put weed cloth under each box to prevent weeds from growing up into the boxes.


Next step is to mix the garden mix to fill the boxes. Mr. Bartholomew has a special recipe that he developed which is 1/3 vermiculite, 1/3 peat moss, and 1/3 compost. The initial cost of this is a bit, but it is the only time you will have to do it. From here on you just keep adding compost which is quite inexpensive or free if you make your own compost, which I do.


After mixing and filling the boxes you then need to make the square foot grid. I just bought inexpensive molding from the hardware store and we put it together one night for a family activity. Doesn’t Michael look like he is having more fun than he can handle?!?!?!


You can attach this to the garden boxes or just lay them on it which I did to make it easier when mixing in more compost in the future. Now you are ready to plant! I received a handout showing what and how many plants to plant in each square foot. Basically, you need to determine if it is a small (ex.-radishes, 16 plants per square-foot), medium (ex.-beets, 9 per square foot), large (ex.-leaf lettuce, 4 per sf), or extra large (peppers-1 per sf). Then you map out your garden and decide what you will plant.


Several of the large plants can be planted on a trellis so they take up even less room because they are growing up, this is called vertical planting. I was amazed at how much I was able to plant. More than I had ever fit into this same gardening space.


After planting, I put together a drip line with one head in each square and attached it to my faucet so I just turn on my hose for an hour and it drips onto each section to water it evenly. ***Note-I did use a sprinkler for the first 2 weeks until all the seeds had sprouted, then switched to the drip system.


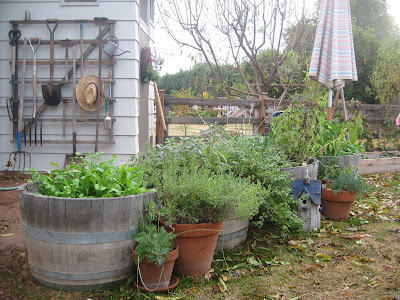
I have already harvested 1 batch of lettuce and radishes since I planted in September and as you can see, now in December it is going strong.


The selling points of using this method of gardening are: 1-I don’t need to solorize the soil in the summer, 2-the ease of weeding is tremendous, and 3-since you can garden in Maricopa county year-round, it means less time in the hot summer you need to spend maintaining the garden.

Now I admit, I have only been doing this for 4 months and I will let you know how I feel about it in July and August when it is 115-120 degrees out there but since I usually didn’t garden in the summer, I will try it this year to see if I like it or not.


So, I recommend you check out this method. It does take some work to begin with but the time savings so far in the actual gardening has been less than the building of the garden so I have come out ahead time-wise. That time savings means more time for other things I enjoy doing, like playing with my graden train!


Mel Bartholomew teaches workshops all over and he insists this method can be adapted in any climate and location. Try it and let me know what you think!

Friday, December 11, 2009

ROASTED CAULIFLOWER WITH KALAMATA VINAIGRETTE - Gourmet Magazine

I don't love cauliflower but my friend, Jennifer, does. So when I saw this recipe in Gourmet Magazine I emailed it to her. Then I found myself with a lot of Kalamata olives and a head of cauliflower so I decided to make this. I loved it! Roasting cauliflower brings out a nuttiness flavor. It is delicious and so easy. Enjoy!
  • 1 (2 1/2-to 3-pounds) head cauliflower
  • 1/4 cup extra-virgin olive oil, divided
  • 1 small garlic clove
  • 1 to 2 tablespoons fresh lemon juice (to taste)
  • 1/4 cup pitted Kalamata olives, finely chopped

Preheat oven to 450°F with rack in lower third.

Cut cauliflower lengthwise into 3/4-inch-thick slices. Put in a large 4-sided sheet pan and toss with 2 tablespoon oil and 1/2 teaspoon each of salt and pepper. Roast, turning once or twice, until golden and just tender, about 25 minutes.

While cauliflower roasts, mince and mash garlic to a paste with a pinch of salt, then whisk together with lemon juice, remaining 2 tablespoons oil, olives, 1/8 teaspoon salt, and 1/2 teaspoon pepper. Serve cauliflower drizzled with Kalamata vinaigrette.

Kim

Sunday, November 22, 2009

BULB AND SWEET PEA PLANTING


It's that time of year! This year with the help from family and friends we planted tulips, sweet peas, irises, freesias and ranunculus. We soaked the sweet peas over night. The moisture from soaking helps the sweet peas germinate more rapidly and loosens the skin or shell, which covers the seed. Sometime this spring we should have a beautiful garden.

We planted nearly 100 bulbs. You have to prepare the ground before planting. Good soil makes for lovely flowers. Over the years we've been adding soil amendments to our flower bed. This year we added 11 bags of manure and our own homemade compost. The results have been terrific. The soil has never looked and felt better.


These are the tools we used. These tools work like a charm. The one on the left is called "hand bulb planter" and the one on right is called " bulb dibber". I've used both and they are equally good.


Do these hands look great or what! The soil was perfect for planting. A little dirt never hurt anyone.
Happy Gardening!
Tammy

Saturday, November 14, 2009

BUTTERNUT SQUASH APPLE SOUP


Normally I don't love pureed soups but I really liked this version. This is the quintessential Fall soup! Butternut squash and apples, plus a dash of cinnamon and nutmeg--mmmm, good.

And this soup is good for you with all those good veggies and there is just one tablespoon of butter and no cream.


I roasted the squash for 30 minutes (splitting it in two and placing it in a 350 degree toaster oven). Roasting brings out the flavor of the squash even more than cooking it directly in the soup. But either way would work.

This soup comes from Simply Recipes, a favorite cooking blog.


Butternut Squash Apple Soup


Ingredients


1 yellow onion, chopped

1 rib of celery, chopped

1 carrot, chopped

1 Tbsp butter

1 Butternut Squash, peeled, seeds removed, chopped

1 tart green apple, peeled, cored, chopped

3 cups chicken broth

Pinches of nutmeg, cinnamon, salt and pepper


Saute onion, celery, and carrot in butter. Cook for 5 minutes. Add squash, apple, and broth. Bring to boil and simmer for 10 minutes or until squash is soft. Puree. Add spices to taste

Serves 4

Kim